Materials
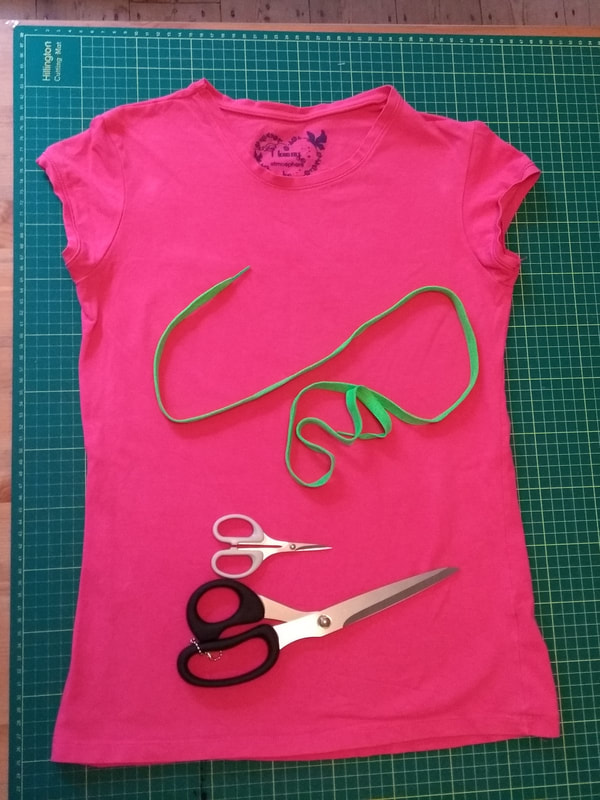
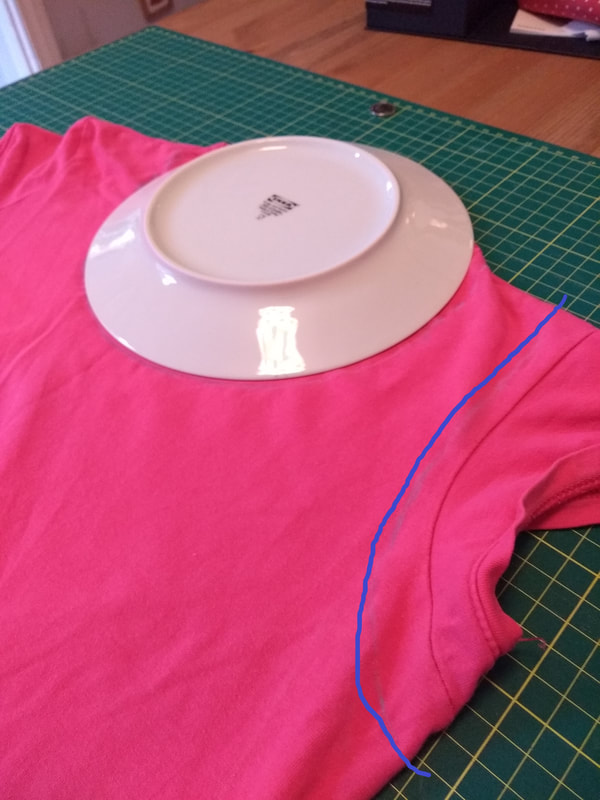
Part 1: Handles and Opening
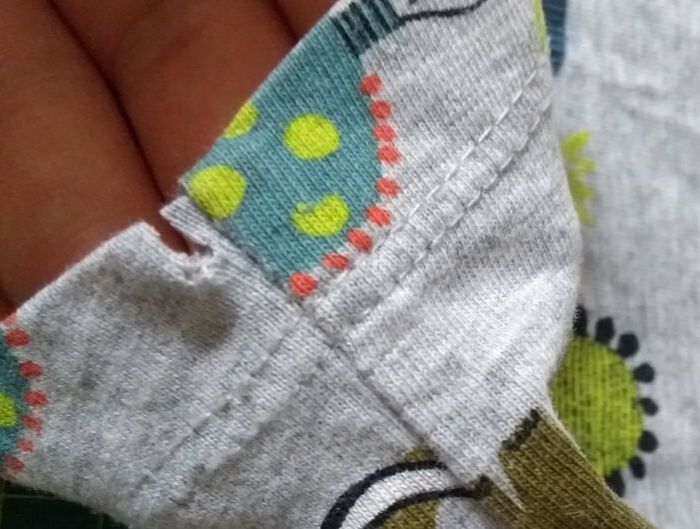
Then keeping the t-shirt close to the table and holding the front and back of the t-shirt together, cut along your lines. Mind your fingers, fabric scissors are especially sharp! For extra security you can use straight or safety pins to hold the fabric together as you cut, but the t-shirt fabric is forgiving of mistakes so you don’t need to be precise. Ta Da! 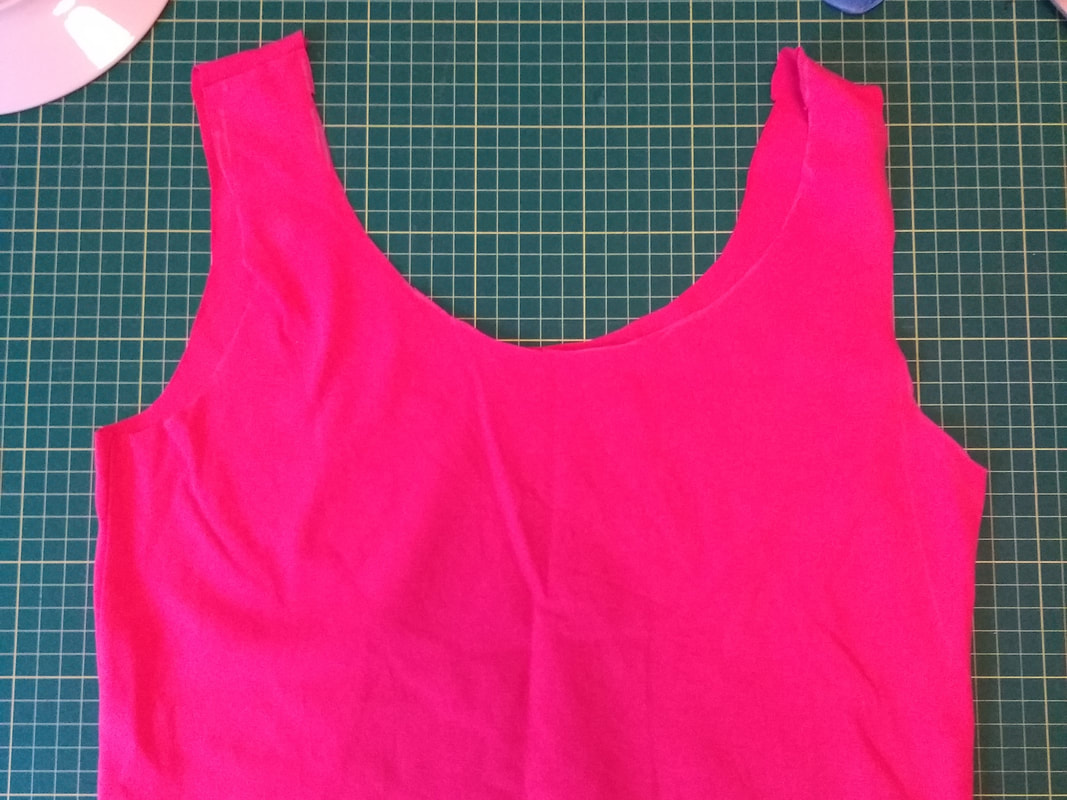
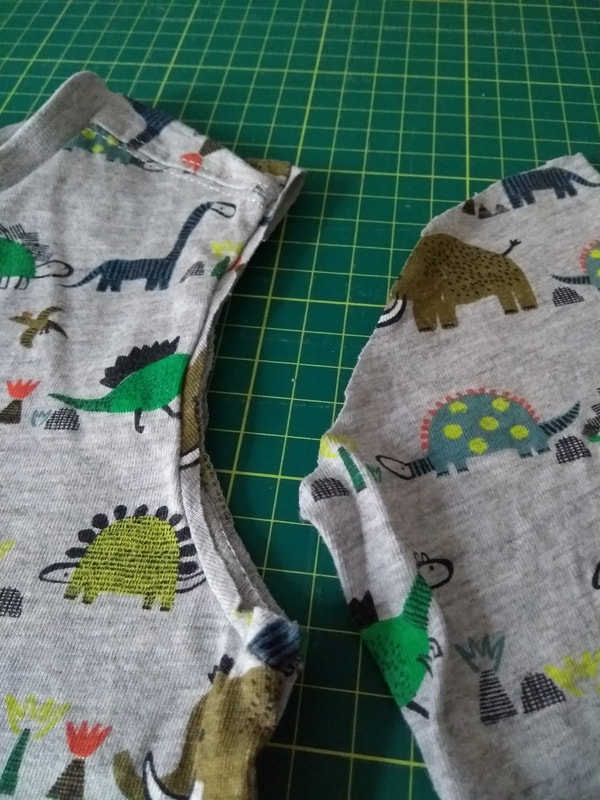
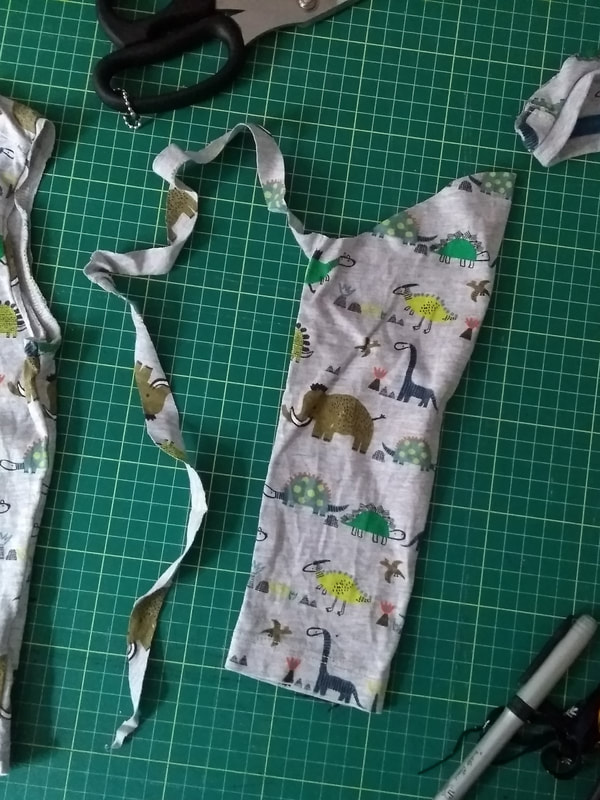
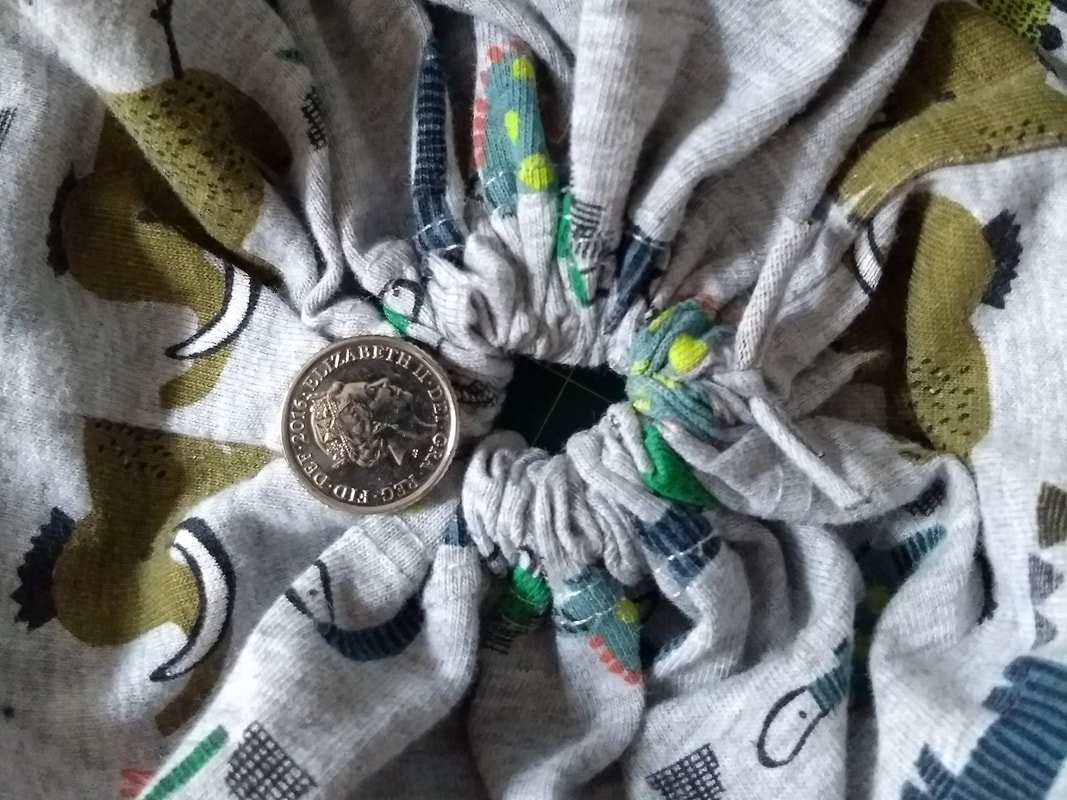
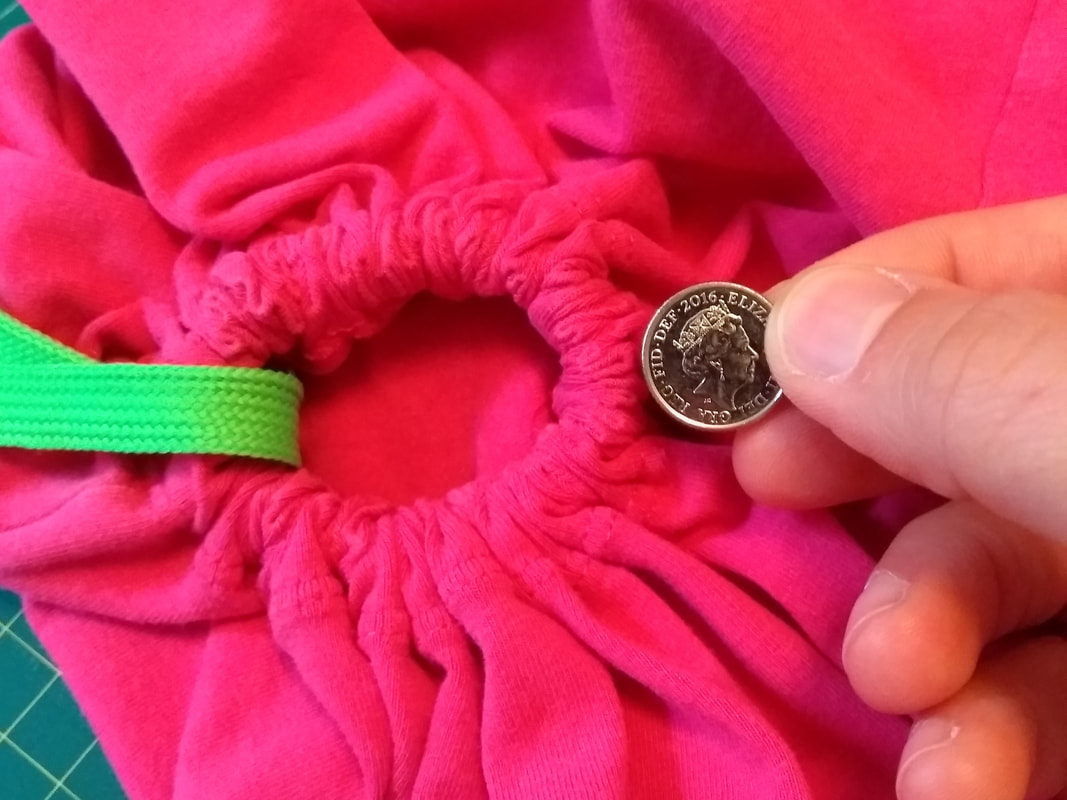
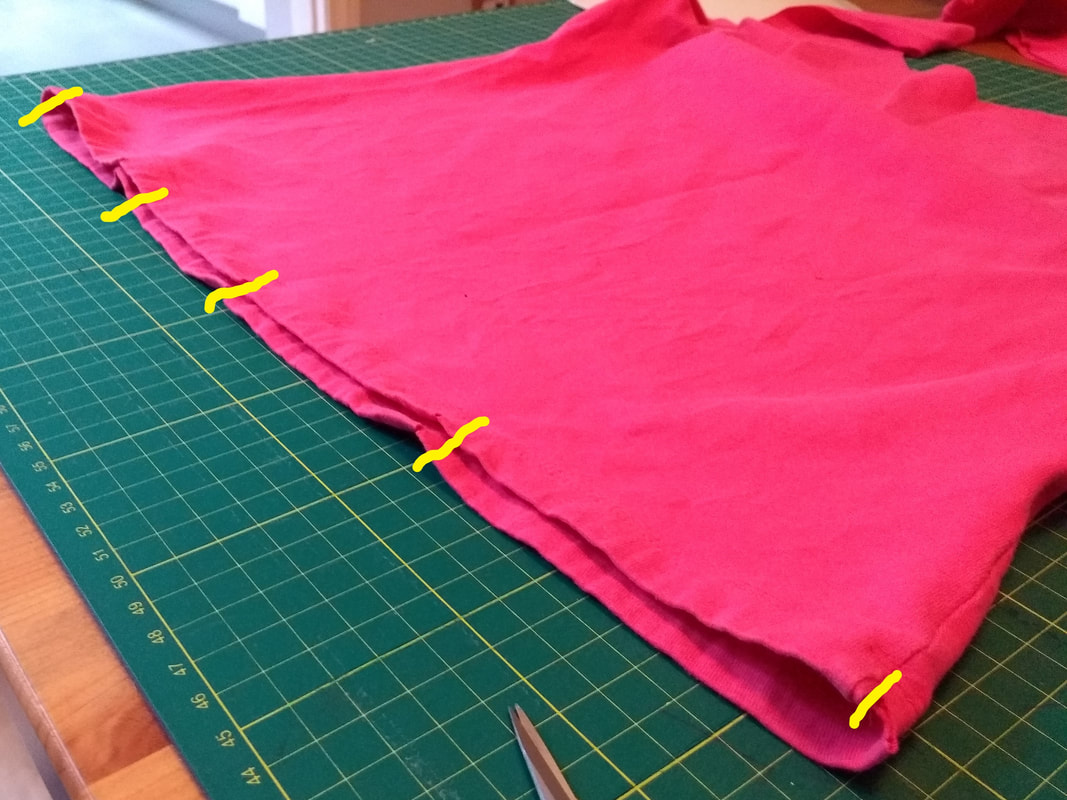
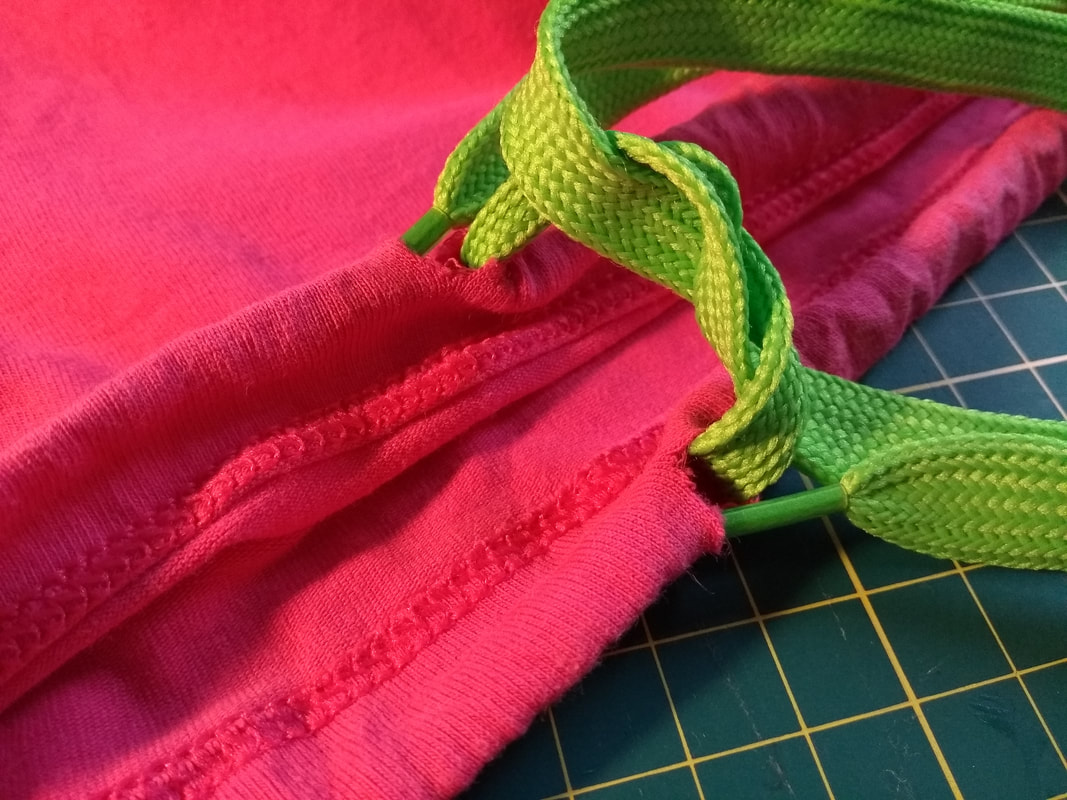
Part 2: Closing Up The Bottom of the BagI'll show you two ways to close up the bottom of the bag. The One Cut Method and the Multiple Cut Method. The pictures above show you what the One Cut Method looks like on two different t-shirts: the Dinosaur Shirt (size ages 3-4) and the Pink Shirt (size 12). If you're uncertain, you can always try the One Cut Method first and see what it looks like. You can always remove the drawstring and make more cuts. Part 3: One Cut Method (for smaller t-shirts)
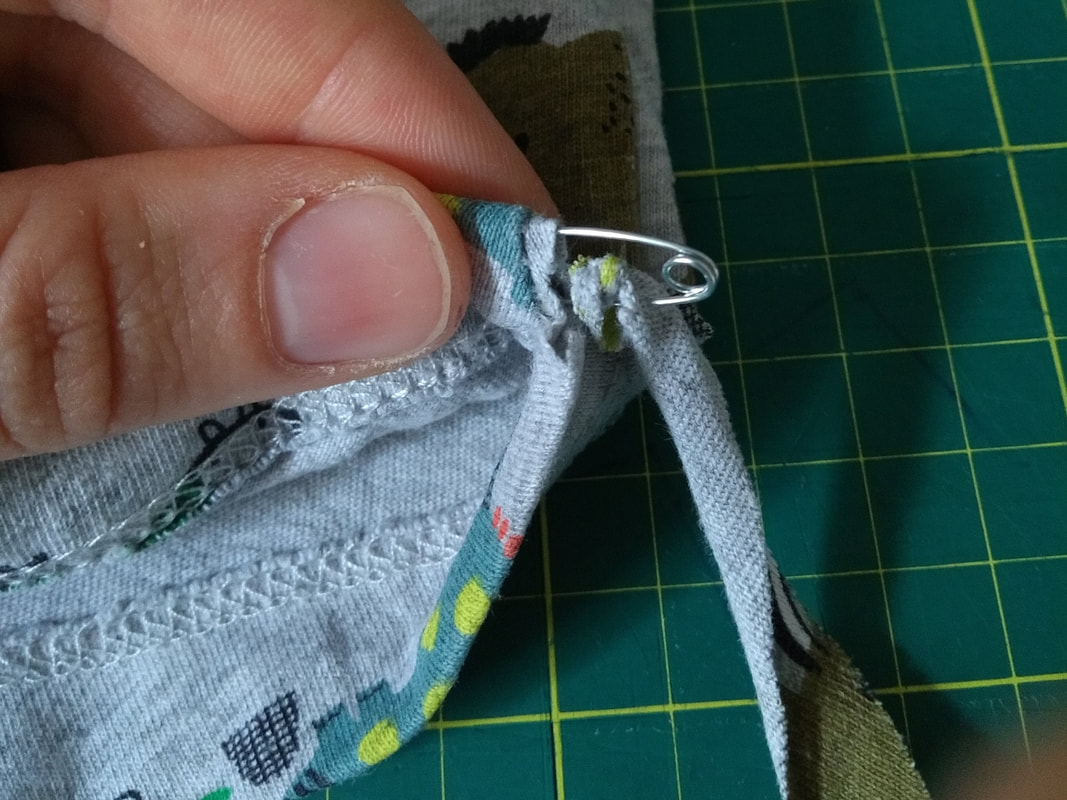
You may struggle around the side seams of the shirt, but just be patient and guide the cord through until it comes the other side of the cut you entered. Then tighten the cord and tie securely. 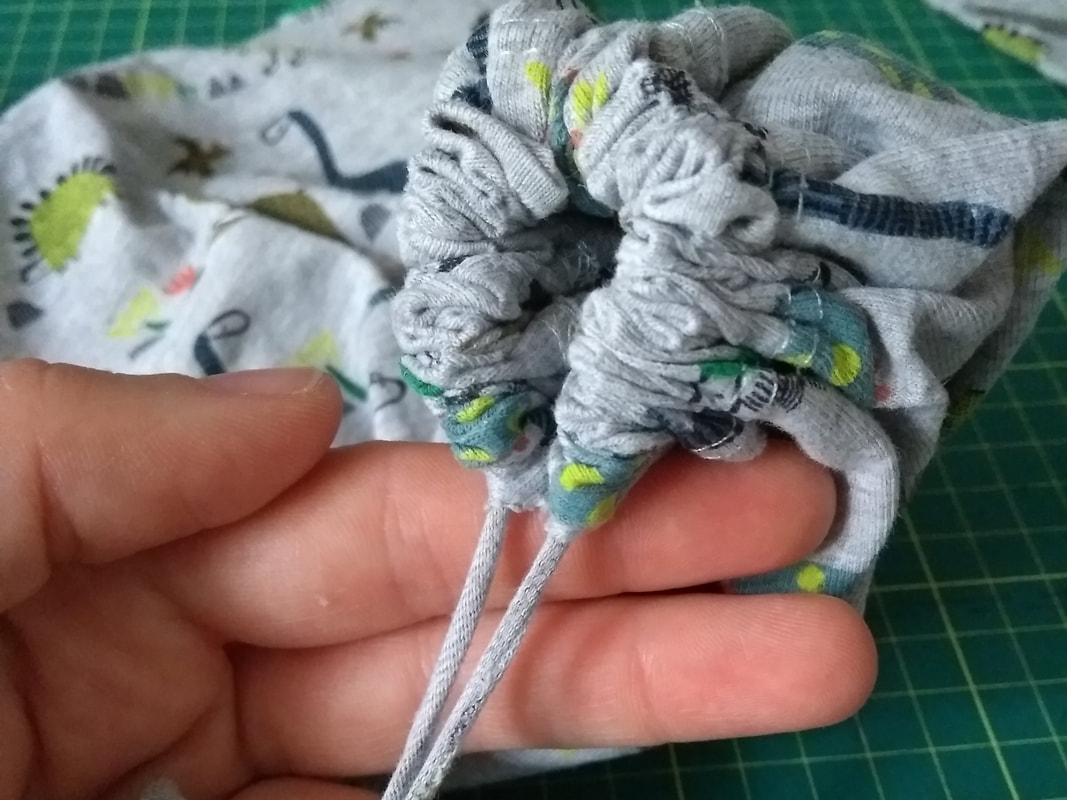 If you want to clip your drawstring tails short, you can use a needle to run some thread through the knot a few times to keep it in place. Part 4: Multiple Cut Method (for larger t-shirts)
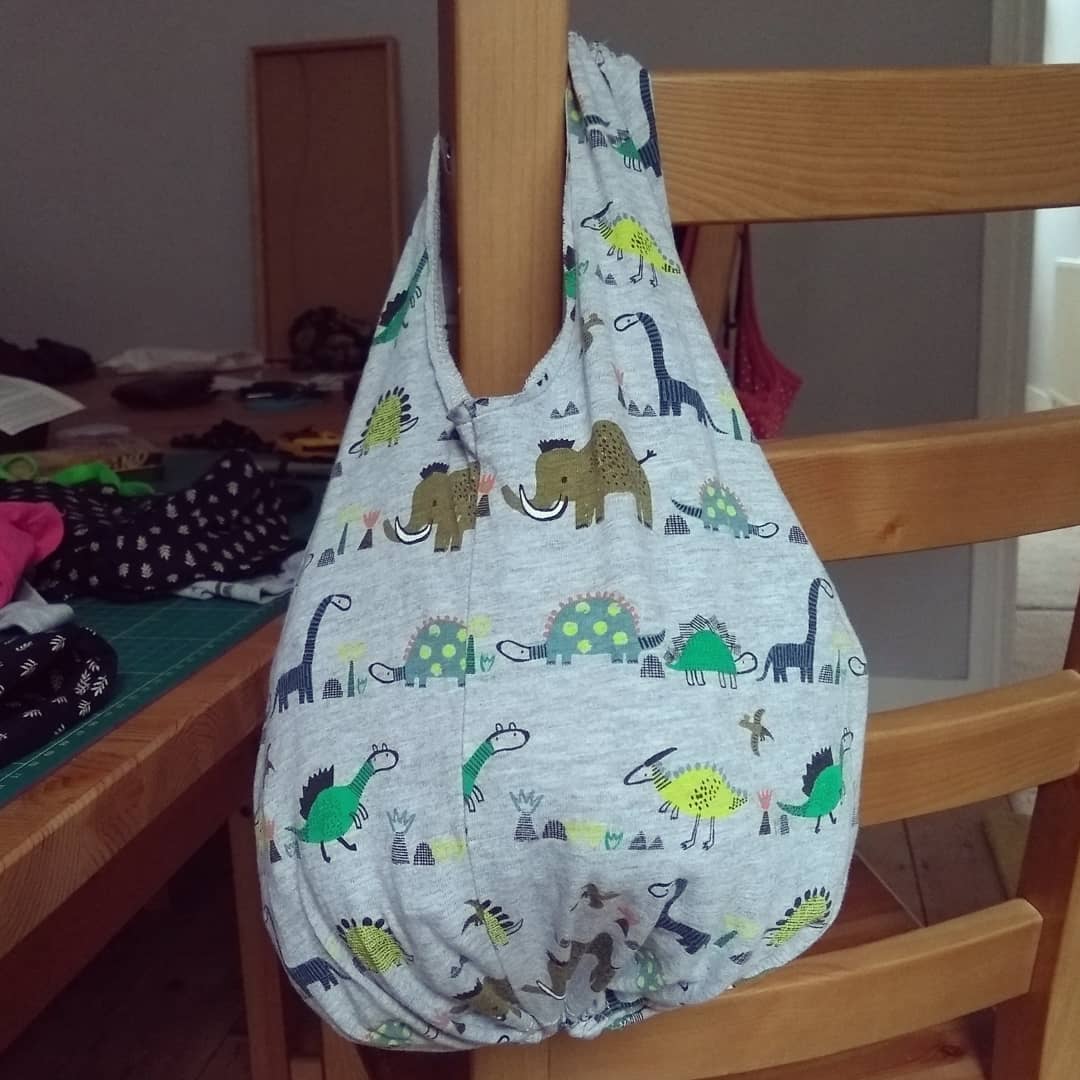
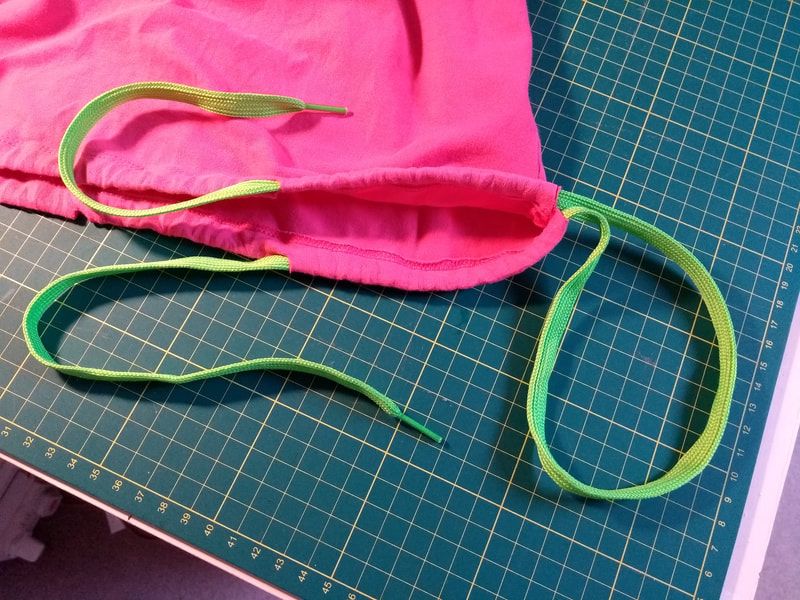
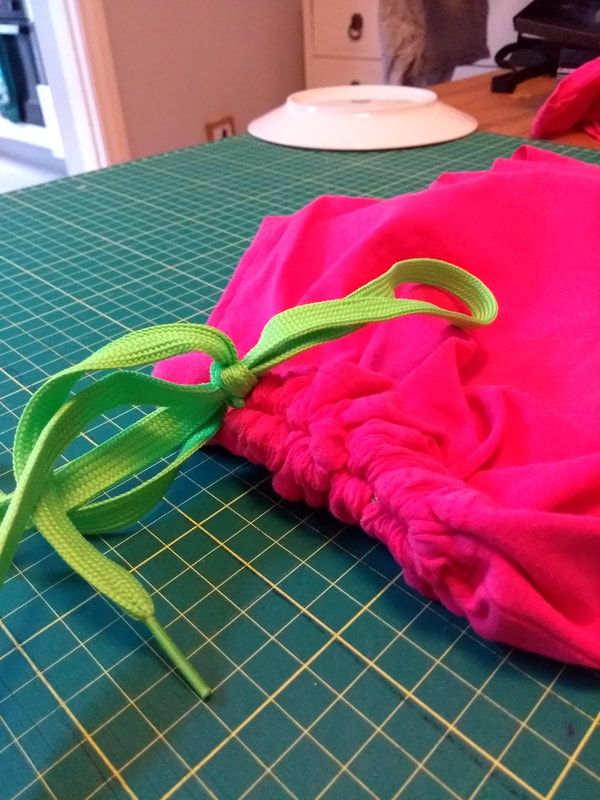
Here is my shirt with the bottom fully laced: 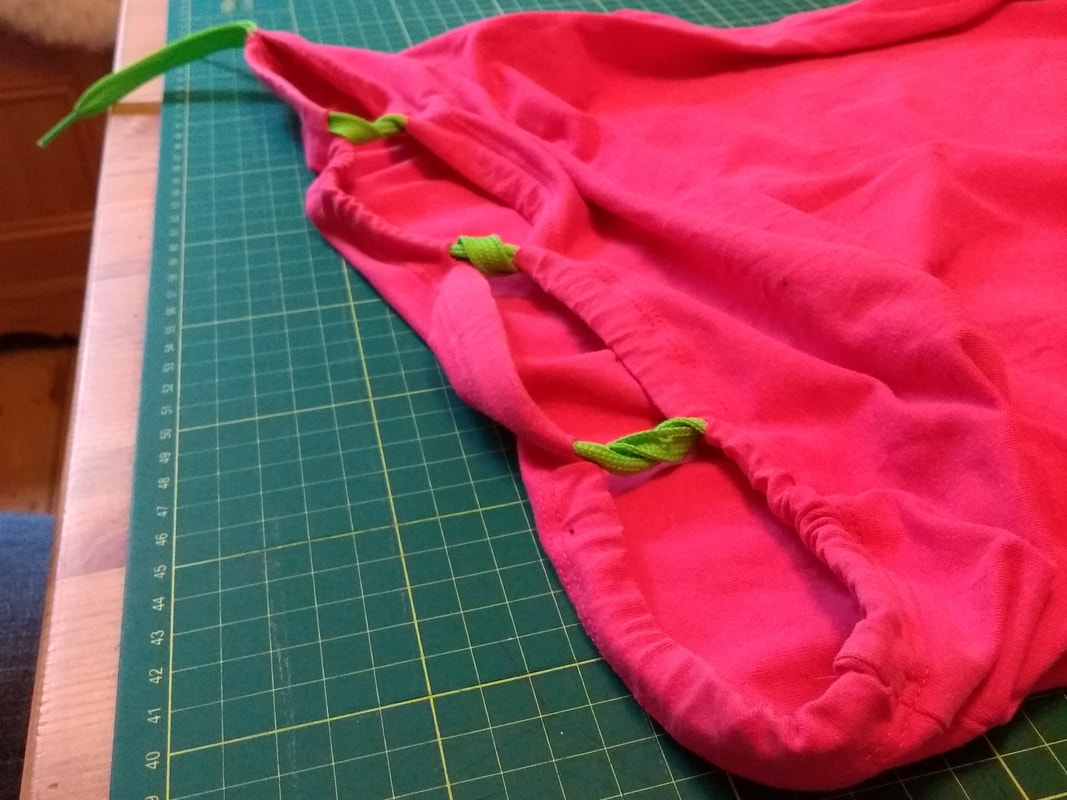
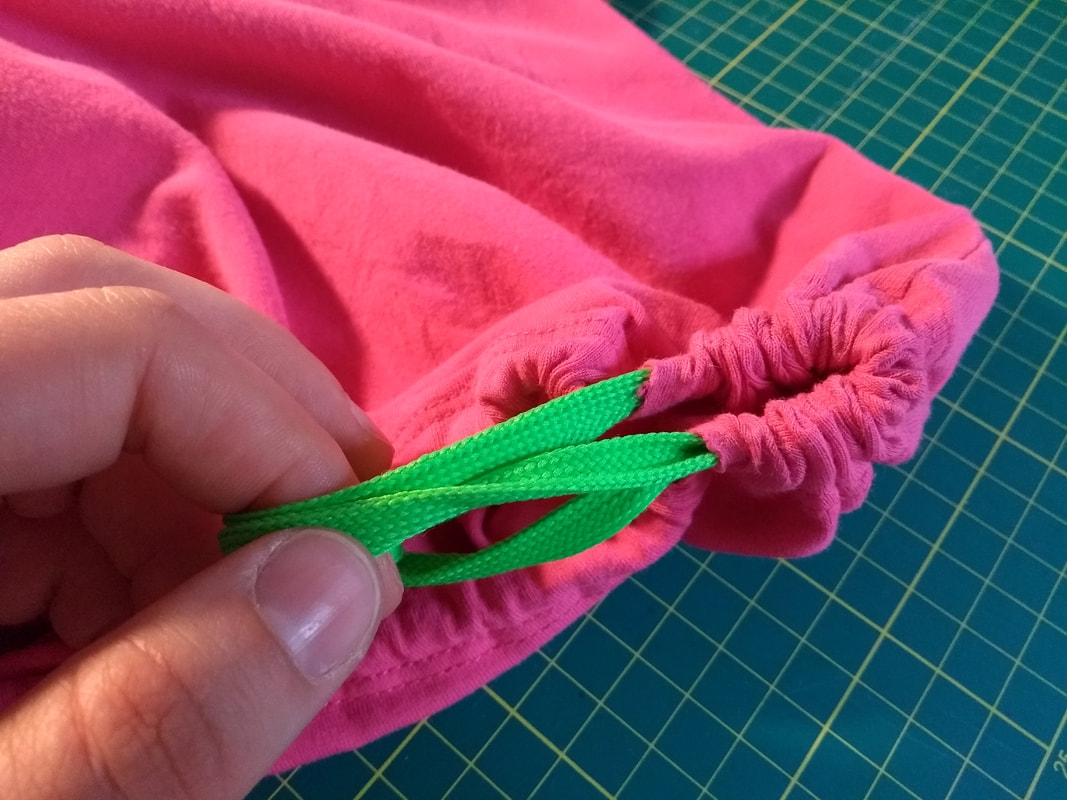
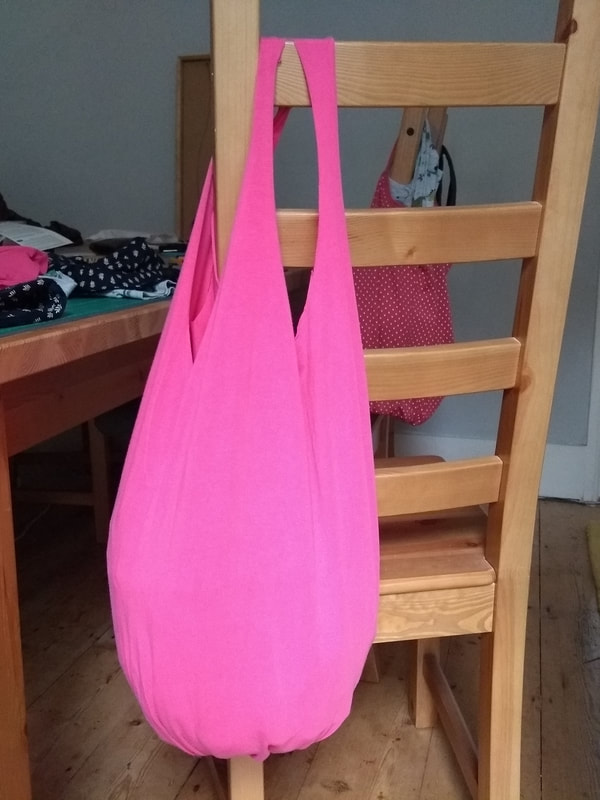
Keep going until you reach the tails. You can either tie the tails off on the outside of the bag (as in the first picture) or feed them into the bottom of the bag before tying and trimming (as in the second). For extra security, take a needle and thread and sew through the knot a few times before tying the thread off. Part 5: Celebrate!Congratulations on completing your bag!
Please dispose of fabric scraps appropriately to where you live. Check your local council website or Recycle Now for more information. OR – you can use your scraps as stuffing in other projects. Try making a pouf footstool or draft excluder.
0 Comments
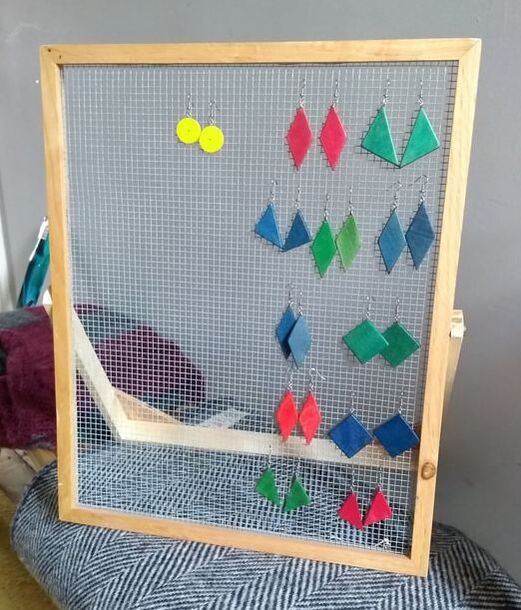
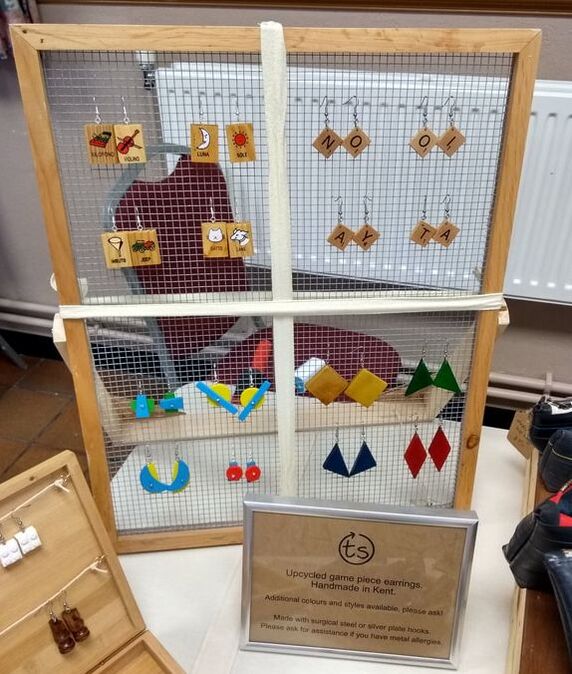
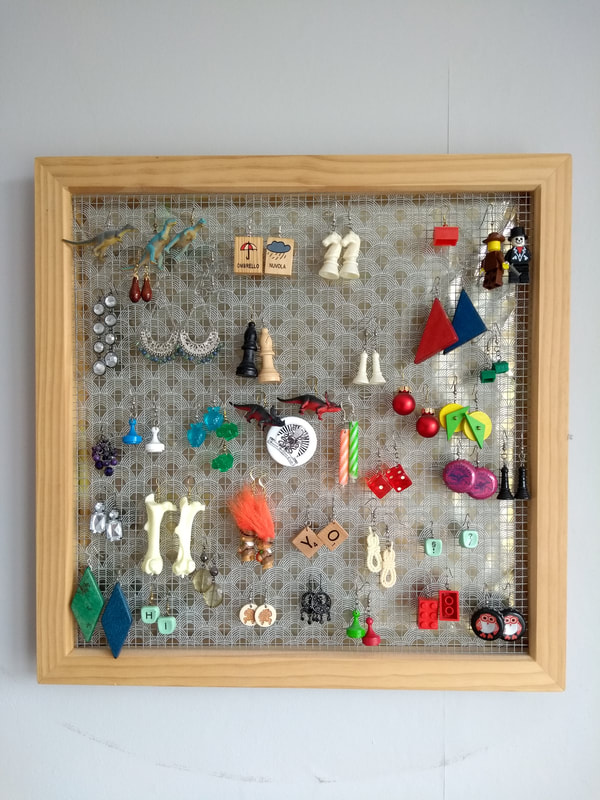
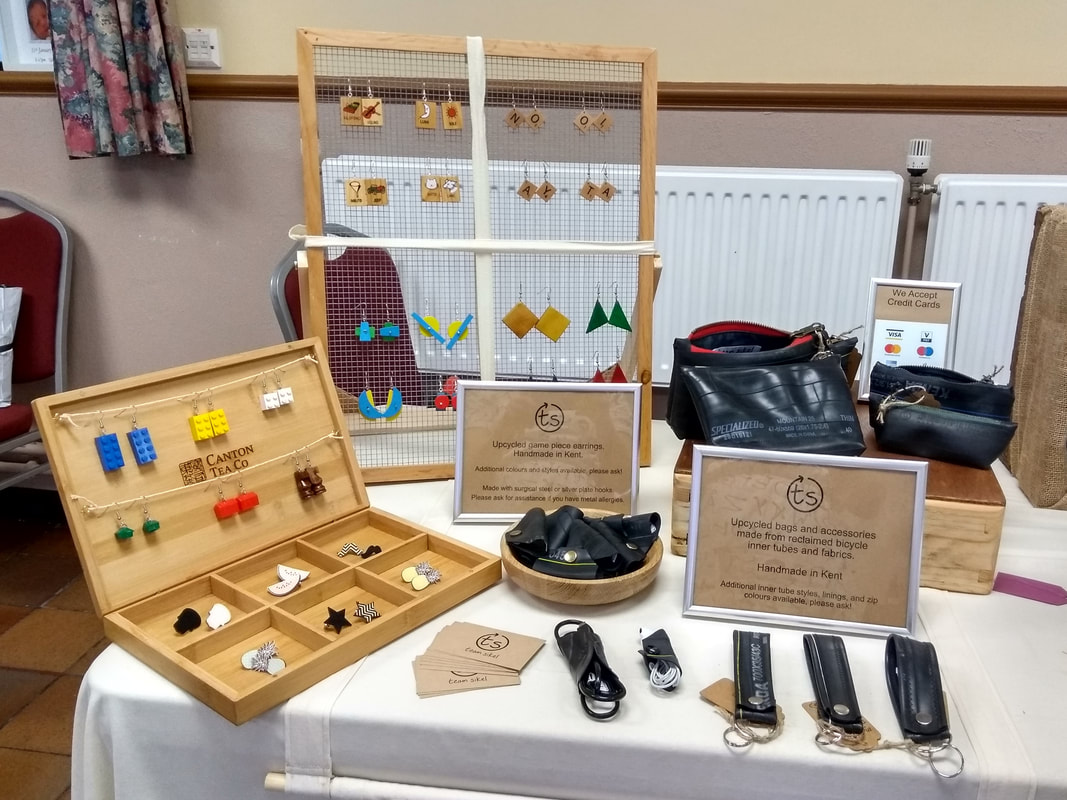 How do you design a craft fair stall that's cohesive and complements your products? Sorting everything out has been a good exercise in thinking about my business. The advice I've read online is to get the essence of your brand, or theme for that event, and make sure everything feeds in towards it. My business is all about creative reuse, so as much as possible was second hand or upcycled by me. It's easy to get carried away with the display, but I did manage to make enough stock to fill it, too!. One of my early wins was this upcycled picture frame, seen below at home, and then in action at my first fair:
I've made these twice before, but noticed a definite improvement this time. And it stands on its own! Without the stand, the picture frame is a simple make that shows off your earring collection in a unique way. Want to make your own?I'm going to go through how to make a wall-hanging version, but if you're interested in how I made my stand, or have any other questions, email me. Next time I make one these, I'll get pictures at every stage (hopefully for the stand as well!).
Step 1: Collect and Prepare your Materials
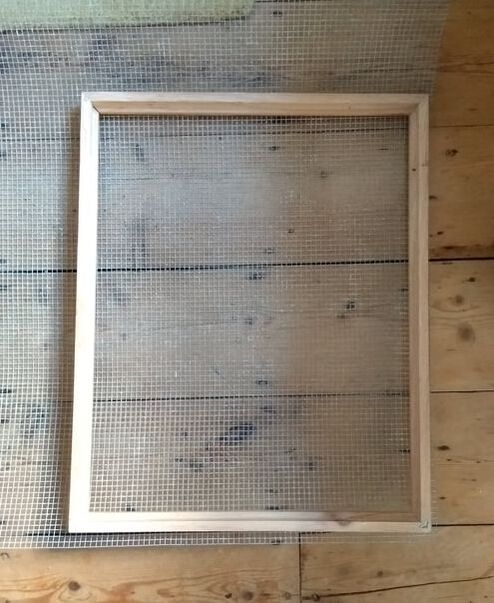
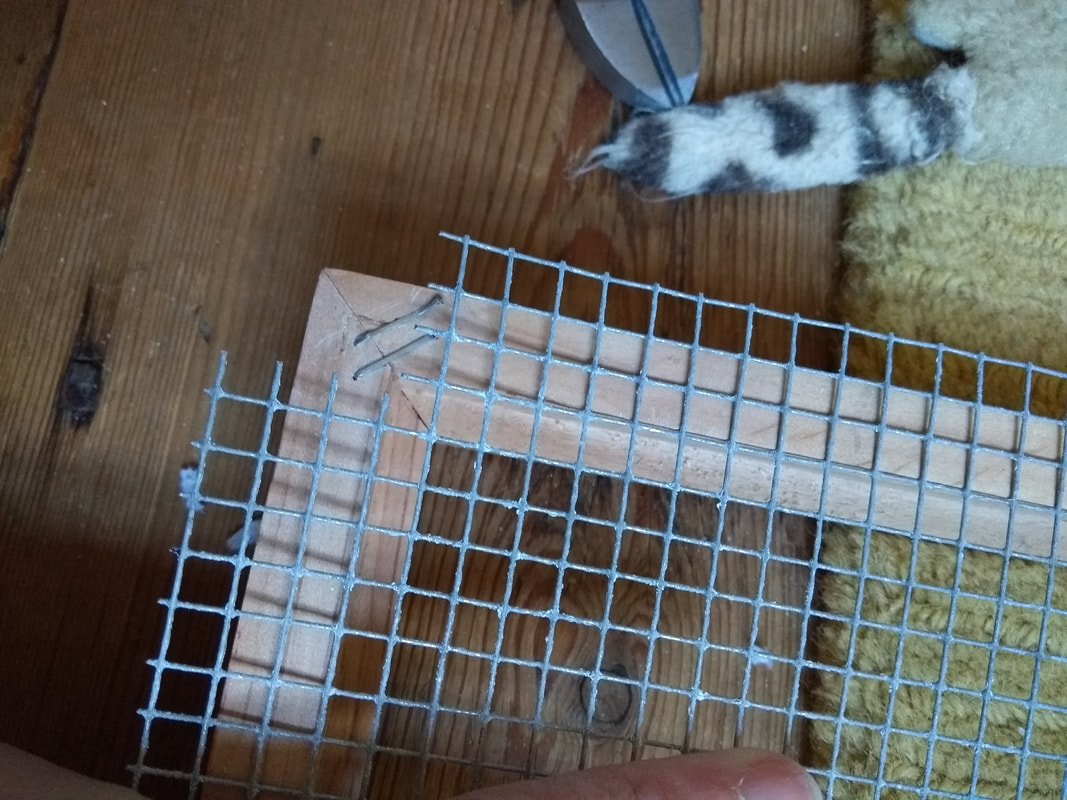
Do any decorating at this stage as well. I like the industrial raw wood look, but it'll be much harder to paint or decoupage with the mesh attached. Measure the height/width/depth of the picture recess- that's what I'm calling the part where the glass and picture go - and the thickness of the frame around it. My picture recess was 51 cm high x 40 cm wide x 1.5 cm deep. The wood around the recess was just over 1 cm thick. Make sure you have more than enough mesh to fill your frame, and that your staples are short enough not to bust through the side of your frame. I found mesh at Wickes in their garden section. It came in big sheets, and I probably have enough to make two. Chicken wire would work, though you'd have less places to hang your earrings. Porch or window screen mesh looks a little more refined, but I have no idea where to find it in the UK. My staples came with they staple gun. They're not anything special and rather thin. Thicker gauge ones are easy to tap in later if you need to. Step 2: Cut your mesh to size
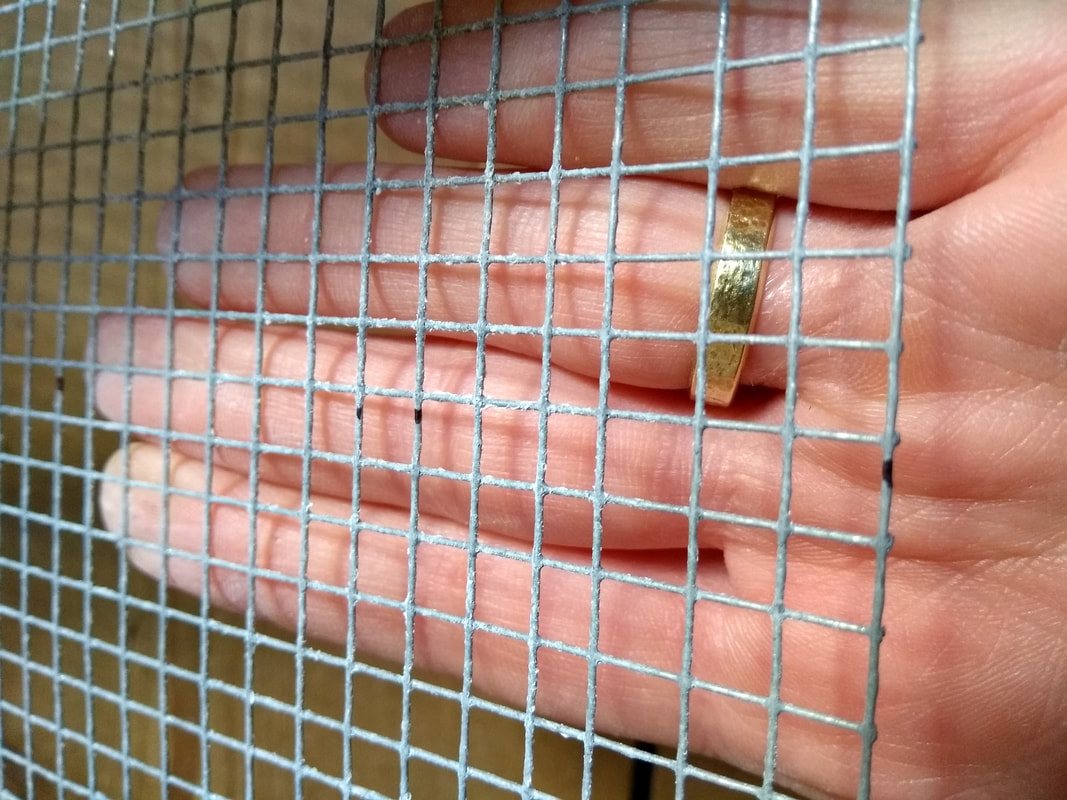
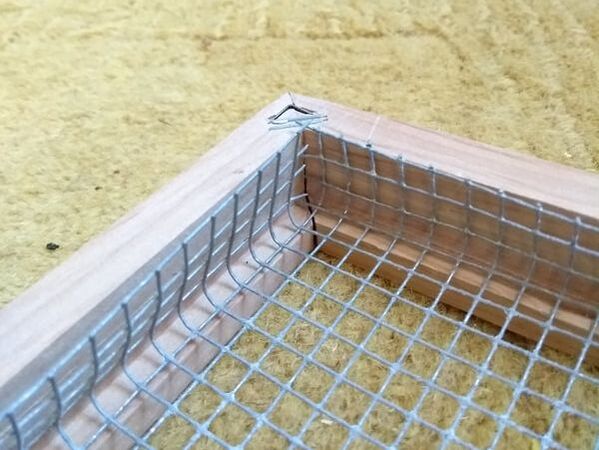
Take the picture recess height and width, and add a little less than the recess depth on each side. If you're using a box frame, you can do much less than the depth. You just need enough for the staple gun to catch and hold the mesh in place. My picture recess height and width were 51 cm and 40 cm respectively. Adding a little less than 1.5 on each side- I'll go with 1 cm- gets me to 53 cm x 42 cm. (NB: when doing this version I added the full 1.5 depth, or maybe even a little more, which caused problems later. For the purposes of my measurements in this section, I'm going to pretend I did it properly). Mark along the mesh at intervals (first picture above), and cut with your wire cutters. Be careful not to cut yourself, and wear the gloves to prevent any injuries from the wires. Once you've got it cut out, remove the corners as shown in the second picture above. Take out a square with sides as long as the extra amount you added. I removed a 1 cm x 1 cm square from each corner, but your measurements will vary. One of my cat's toys is making a cameo here, but Tilly was well away. Pointy wires and pets are not a good combo. Step 3: Fold and staple in your mesh
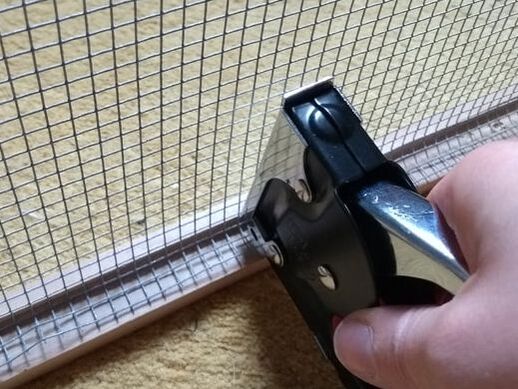
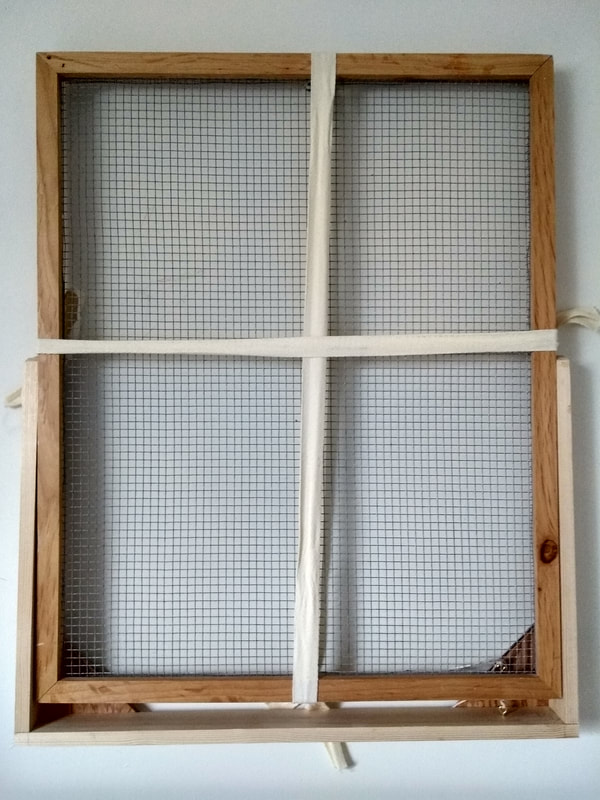
Carefully fold the mesh to the dimensions of your picture recess. Check that your mesh fits properly within the frame. As I mentioned in the section above, I added too much to my picture recess dimensions, and on my first attempt, wires were poking past the edge of the frame. That meant it would leave scratches on the wall. If you follow my instructions above you shouldn't have this problem, but if you do, just take it out of the frame and cut off a little more along each side. Once it fits properly, use your staple gun to attach the mesh (picture two). Start at the centre of each side, and once all four sides have a staple in, you can move towards the corners. Use enough staples that it's secure. You may need to use a hammer to tap in any that aren't fully in. Step 4: Hang and Enjoy Hang using your preferred method. As I don't store my earrings on the display, I balance the display on a nail in the wall when not in use (first picture). But you should use something sturdier, like those command adhesive strips. Or if you've used a box frame like I did in an earlier attempt (second picture), you may be able to put the normal backing board onto the frame and use that with a nail on the wall. The box frame gives you the added bonus of being able to change up the background.
 I'm doing my first Craft Fair...or, should I say, Fayre. Just in case you weren't sure you were in the UK While the image is a link to their website, they don't have any information on it yet. The organiser gave me this information though:
So a day out for the family, plus craft and business stalls. I'll be inside, if you can tear yourself away from the excitement above, come say hi! I'll give more information when I have it.
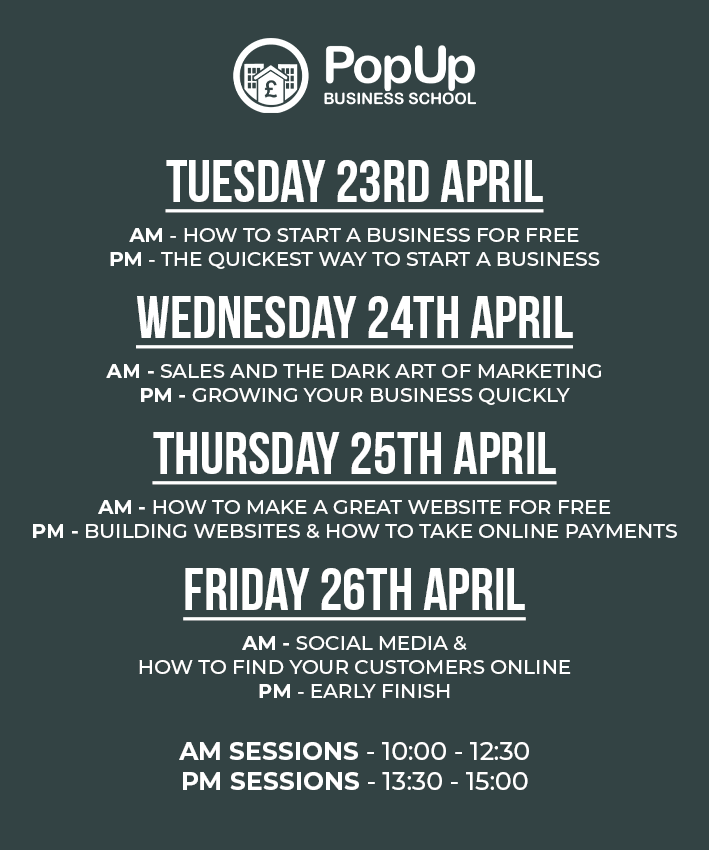
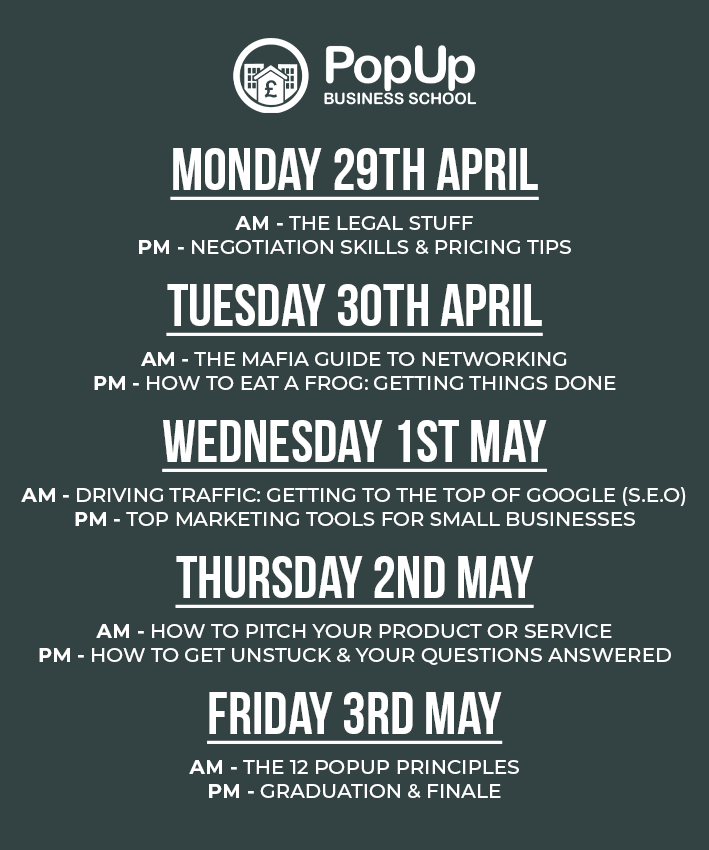
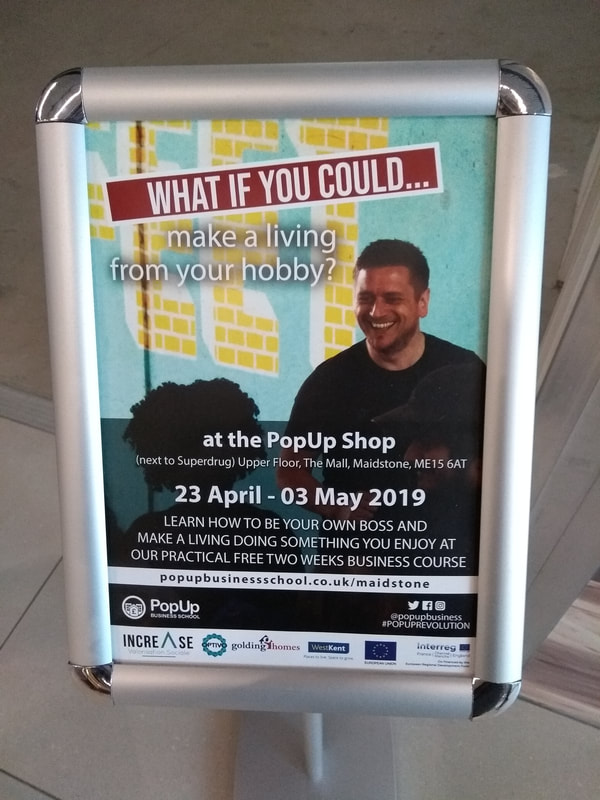 I'd heard about Pop Up Business School during my last job. It sounded really cool, but as it was during term time I couldn't take advantage. But then I got made redundant a few months later, and happened upon the eventbrite page for one of their events happening in Maidstone. It was almost like fate.  This is what i walked into on my first day. I wasn't sure it would be for me. Seeing that, you might not be sure either. It's all part of their ethos: done is better than perfect. Do the best with what you have and don't get into debt. If you see an event near you, give it a go. It's no commitment, just show up the first day (or any day you're free), and if you like it, keep on coming. This was the schedule:
Images from the Pop Up Business School Website It was packed full of useful stuff. Ask as many questions as you like, get advice from the trainers, and talk to like-minded people going through the same things you are. You'll probably meet someone with contacts or who can give you an idea you hadn't even thought of.
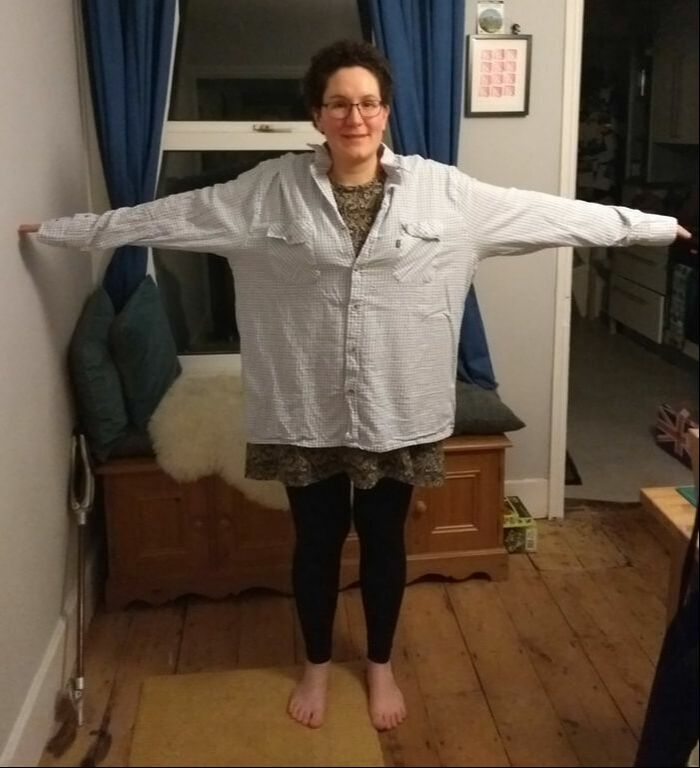
It's a really powerful, inspiring experience. It's a lot of common sense information, but I got that little nudge I needed to get going. I made this website. I started posting on instagram. I contacted events I could sell at. It might not work out, but at least I'm giving it go. If you could do anything, what would it be? What's stopping you? Thank you so much for coming to my site and reading my blog. Let me tell you a little about myself and why I started Team Sikel: I've always loved making things. Honestly, I'll give just about anything a go. Recently I've started sewing my own clothes, and whenever possible I use fabrics from charity shops. Though I'm always on the lookout for metres of fabric, or more often duvet covers, I've started playing with fabric from garments, using patterns so they're better suited to me. Here's a hack of Megan Nielsen's Darling Ranges Dress (dodgy photos courtesy of my husband):
I made the dress (right) from two shirts my husband couldn't wear for work (left). They were cheap things from Amazon, with bizarrely stiff cuffs for the thin fabric, but they work well as a casual summer dress.
There's so much stuff produced in the world today, and so much ends up in landfill. I want to do good with my work, and after an unfortunate redundancy, I've decided to pursue that passion. Team Sikel (pronounced cycle) will specialise in creative reuse and upcycling. I'll sell things I make, but want you to have a go! I'll have kits for sale for those who want some guidance, and offer classes around Maidstone. My current product range is inspired by an activity I lead at my last job: using the waste products of a bicycle repair project. Punctured inner tubes almost feel like leather, and can be used to make cool stuff! Send me an email if you'd like updates on when new products or classes are available, or use the contact form on the home page. Or please leave me a comment! Is there anything you'd like to see for sale? Or any leads you have for places to hold classes? |
AuthorI'm Kelly, a maker passionate about learning new things and giving materials a second life. Archives
August 2019
Categories |

 RSS Feed
